This is a guest article by Verity my sister-in-law. I visited her on a long weekend a little while back, to teach her some cooking basics. We spent 3 days cooking up a storm trying to cover a variety of dishes (I think we did over 12 dishes) to cover the basics. It was my very first time teaching someone how to cook and I felt it went very well . I was quite impressed at how quickly she picked it up. She was kind enough to write down her experience as a first time cook and share the tips and things she found useful during our cooking 101 weekend. Thank you Verity!
To say that I am a bad cook is probably a gross understatement. I am the person who could burn water and ruin cereal. I have never been comfortable in the kitchen and have struggled with following the basic of recipes. When most people say, “This is an easy recipe to follow!” I cringe and know that I will most likely ruin it. I have always wanted to know how to cook and have tried over the years to make good dishes, but something always ends up amiss, inevitably something ends up bursting into flames, every pan and pot ends up dirty (even the ones that I didn’t use), and the fire alarm is blaring. Yes, I am that girl. Well, the very talented and patient “Picture the Recipe” expert came to my very own house to offer her expertise and to be my very own personal chef and coach. I should begin by saying that a lot of what I found to be the most invaluable tips and ideas, you might, and probably do, already know. However, for those culinary challenged folks like myself, I hope you find this to be as helpful as I did.
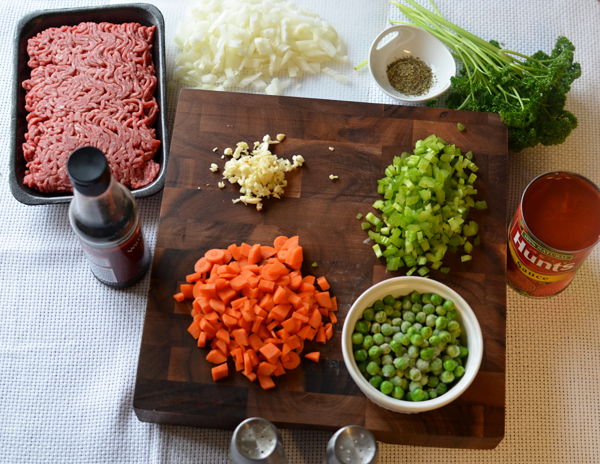
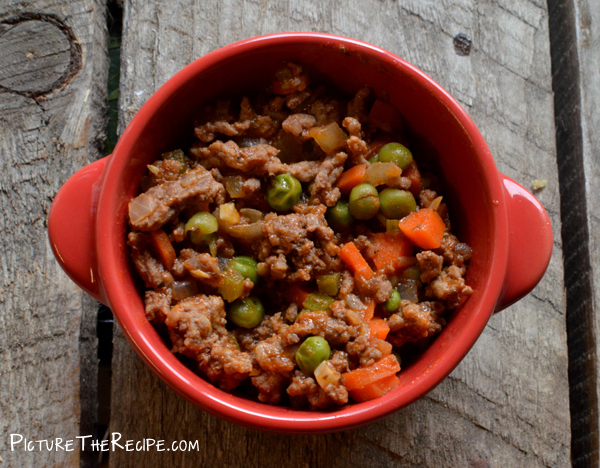
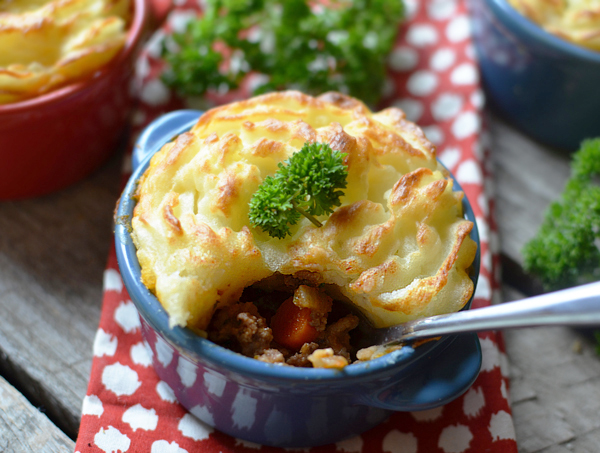
We started with a Shepherd’s Pie. This recipe ended up being much easier than I thought. When I first saw it looked a little daunting. However, let me tell you some of the basic things that will help right from the start. If you are like me, when you look at recipes, you see that it states to dice, chop, slice, or mince and you have no idea what the difference is between these and how to do each of these different cuts. The trick I learned was that whenever you can, place the produce with the flat side down while cutting, this will maintain control and accuracy while holding the veggie or fruit in place. Although this may seem obvious to most of you, it wasn’t to me. Once I did this, I felt much more comfortable cutting and felt like I had more control. Sometimes it is the little things that make the biggest difference. This really helped me to understand what I needed to do. I also had no idea how to properly cut veggies and I am a little nervous around knives. (I’m generally as likely to cut my fingers as the veggies). Before we get into the actually cooking, lets cover some of the basic tips I learned about cutting and fun tricks I learned with some of the ingredients.
- Minced: Cut into tiny pieces.
If you hold down the pointed end of the knife against the counter/table with one hand and lift the handle with the other hand not picking the knife up but instead moving (or sliding) it over and really only moving the handle, this gives more control to how and where you are cutting. Quicker movements and tiny cuts create a finely minced product. You can also runn the knife through it again for a finer mince.
- Diced: Cut into fairly small pieces
This is still accomplished by holding the handle with one end and moving the object being cut with the other without picking up the knife all the way if possible. You make slightly bigger cuts than when mincing something.
- Sliced or chopped: Cut into fork sized pieces
If you hold the veggie and curl your fingers in while you hold the produce, instead of laying your figures flat, this helps keep your fingers out of the way, especially while slicing. Push your fingers toward the knife and glide the produce at the same time.
- Carrot Cutting – Cut the carrot in half, length-wise and turn it over onto the flat side so it doesn’t roll. This has solved years of chasing carrot slides around my kitchen floor. This will also allow you to have more finely diced pieces instead of big chunks and flying pieces.
- Celery cutting – stack celery before chopping and slicing. This stacking technique is amazingly efficient. When you are done with the celery, you should wrap the celery in a paper towel before putting it in the fridge. This helps to make sure the paper towel absorbs the water instead of leaving it on the celery which makes the celery go bad faster. This is also true for other leafy produce (parsley or green beans)
Onion Cutting:
Cut in half lengthwise and peel away the top part of the onion before cutting. Just rip off the outermost dry layer when you peel.
- Dicing Onion– Cut the onion in half lengthwise from root to tip so that both halfs have the root part and the top part where it shoots. Leaving about about ½ or ¼ of an inch at the root end (this holds the onion together while you cut it)make vertical cuts in the onion depending on how big you want the pieces to be. This will make cutting and dicing the onion much easier, since it wont fall apart when you’re cutting. Then you slice horizontally. This leaves you with nicely diced onion pieces.
- Slicing Onion– Cut in the middle so you have two halves of an onion. Lay the onion on the flat side and cut so that you get ½ circle slices.
Garlic dicing and Mincing:
Cut the hard end off (not the top where you can peel back the outer layer). Place the garlic under the flat side of the knife blade and press down on the blade until the garlic clove is crushed. The peel comes right off and then roughly chop while holding the front of the blade to the table and dice into small pieces.
Once things were cut as instructed in the ingredients, we got to business. One thing that I found to be really helpful is that when we boiled the water for the potatoes we added a generous amount of salt for flavoring. This was a great trick and I noticed it really did add a lot of flavor to the potatoes.
- Whenever you boil something, use salt generously to add flavor. This is true for pasta, potatoes, rice, veggies, and eggs. (see Today I Found Out article on Why adding salt enhances flavor )
Right from the beginning, I learned how to know when the onions are done. I often overcook my onion and burn the garlic. While cooking, I learned that the onions are done when they are translucent and that this is true whenever cooking onions. At this point, you add the garlic which is than cooked for a few minutes. While adding the ingredients, I found that I wanted to stir it all the time, even after everything was mixed together properly and was waiting for it to boil. This recipe doesn’t require much stirring, since you really need to let the mixture simmer to a boil.
What I like most about this recipe is that the base of this makes a great sauce for pasta. The sauce for pasta is delicious and with a little added cheese is perfect. I like that I can use this recipe for more than just a Shepherd’s Pie.
Next we made a pasta salad. This is a delicious salad that in the end I found to be fairly easy and could be made in a variety of different ways to either fit what you have in the refrigerator or fit something for a particular meal.
While boiling the pasta, I learned that you can tell the pasta isn’t done when you can still see a yellow tinge on the pasta. This was a great tip because once I watched the color I was able to make sure my pasta wasn’t undercooked or overcooked, which is a big deal when you can’t seem to cook pasta correctly.
When you are cooking pasta and you want to boil some veggies along with it, it’s good to add the veggies when the pasta is almost done (putting the veggies in too early will make soggy veggies and putting the veggies in too late will make soggy pasta). I found that when there is probably three to five minutes left, you should add your veggies (like asparagus or broccoli).
I love asparagus, but have never really known how to tell which part of the asparagus to use or how to cook it. This turns out to be really easy. To find out, you bend the asparagus in half and where it breaks is the most tender spot. Cut the bottom two inches off and cook for 3 to 4 minutes.
The recipe called for a cucumber. When you are putting cucumbers in a salad, you need to peel the cucumber, cut the cucumber in half length-wise, and then spoon out the seeds. I thought this was a great tip so that your cucumber didn’t get everywhere in the salad. Put the flat side of the slice on the table and cut into long strips and then cut the strips in half. This produces very nice, thin slices of cucumber.
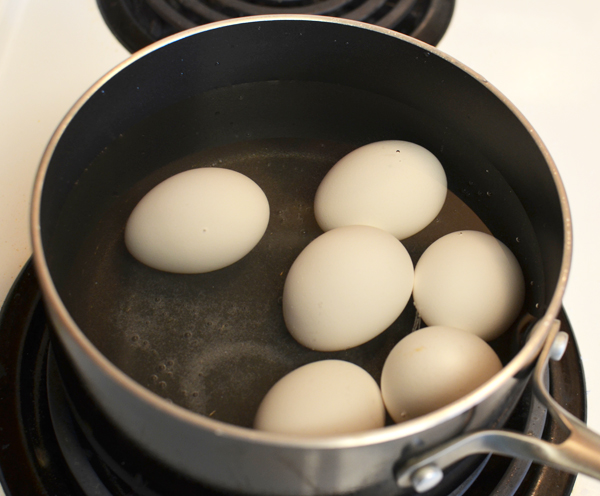
The recipe also called for hard boiled eggs, something I thought I knew how to cook, but turns out I was doing it wrong. Put eggs in the pot and pour in cold water until it covers the eggs (add salt to the water) and bring the water to a boil on medium heat. Once the water is boiling, turn off the heat and cover for 17 minutes.
Run cold water over them and peel. Now this might seem like a straight forward recipe and it is. In the past, I have either over cooked my eggs or undercooked my eggs which isn’t great either way. This makes the PERFECT egg (at least on my stove), everytime! Something I never knew before was that when you cut your egg in half and it has a grey ring around the yoke, that means they were over cooked. I never knew this and for years I have been eating over cooked eggs.
Pasta Salad Dressing
This recipe had a great dressing. One thing I really liked about this particular dressing is that it can be the base of other dressings simply by adding or substituting one or two ingredients. If you are a beginner, this makes a huge difference as it allows for change but you also have something your most comfortable with that you know you can make and is good, instead of making a different dressing for everything.
When adding lemon juice for the salad dressing, I would have normally just squeezed the lemon and then had to look back through to find all the seeds. However, I learned that when you are using lemon or lime juice in a recipe after you cut it in half hold it upside down and squeeze, so that you get the juice but not the seeds. Amazing!
White rice, Spanish Rice, and Fried Rice were next on our menu. Rice is a basic that you can add to many different types of meals and in variety of different ways. Although this is another basic thing that is often considered easy I feel like I never had my rice turn out well unless I used minute rice and then I felt like there lacked a taste. So the things that I found to really help me to master cooking rice was to bring the water to boil (water should fill ¾ of the pan) over medium-high heat and add a generous amount of salt. This salt adds flavor to the rice. Once the water is boiling, add the rice and leave it on medium-high heat. When the rice is tender (like the pasta) strain the water and serve. This is for simple boiled rice. You can then turn this plain white boiled rice into a fried rice.
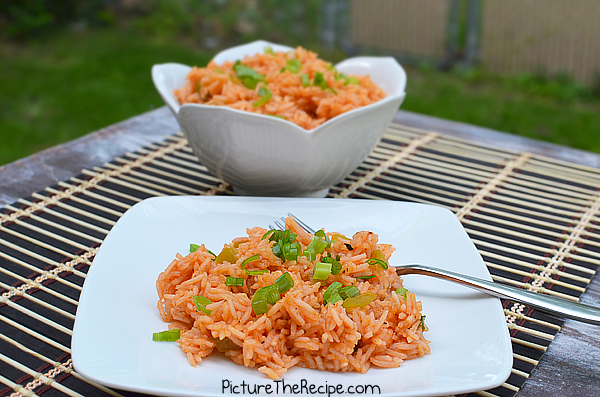
Spanish rice was as just as easy too . The cooking method was slightly different though. When making a flavoured rice, you don’t want to discard the water so you use a simple ratio so that by the time the rice is cooked, all the liquid is absorbed by it. The ratio is simply double the amount of rice you’re cooking. So if you’re making 1 cup of rice, you need to use 2 cups of water or broth (for more flavor). In this recipe we used chicken stock, a little tomato sauce, Italian seasoning, green peppers, and garlic (see recipe). One tip that I did find to be helpful in this recipe is that after boiling the rice, when it is tender and ready to serve, if the rice is still a little wet it helps to take the lid off to let the water evaporate quicker and dry out a little.
Fried Rice has always been a favorite of mine and I was very excited to learn how to do this recipe. I found it to be easy to combine garlic, green onion, sesame oil, peppers, salt, and soy sauce and plain boiled rice. Cooking it was easy, once I learned how cut everything, but the hard part of this was keeping it all in the pan and not spilling it all onto the stove. It would be easier if you had a wok I suppose.
Egg Basics:
I can now say that I am an egg master. Eggs were something that never quite turned out as I had hoped. Now I feel like every time I cook eggs they turn out well and are delicious. There are a couple of tips that I the most helpful when cooking eggs. First is to heat the pan before adding in the egg. This has really helped to ensure that my eggs cook more consistently.
Also, cooking the eggs on medium heat is a good idea as this doesn’t cook them too fast. Adding milk to make the eggs fluffy has also been a valuable tip.
Omelets
Add oil to the pan (1 teaspoon or so) and have the oil heat in the pan for a minute or two. Without doing this, you get burned egg and it also doesn’t flip or turn over well unless you add the oil.
Adding milk to the eggs makes for fluffy eggs. If you don’t like fluff, than don’t add milk. I like fluffy eggs and never really understood how to do that. By using two eggs and 1/3 cup of milk, I whisk the egg and milk together and this makes fluffy eggs.
Omelets have always been hard for me and I often didn’t know how to tell when they are done or ready to be folded over. I learned how to pour the egg into the heated and oiled pan, cover it and wait until the egg is all cooked through. By covering it the top cooks with the steam created. You can tell the egg is ready by shaking the pan and if nothing moves really or wobbles, the egg is ready (If you check to see if there is any runny egg on the top or if it is watery and if there is than the egg isn’t ready). Add filling on top of one side of the pan and on top of the egg. Fillings can be anything you want inside you omelet. It is important to loosen the sides of the omelet by sliding the spatula around the side you want to flip over. Once the side is loose, slide the spatula under and flip the side over on top of the side with all the fillings. These tips helped to make it so now I know how to make an omelet.
Fried Egg
I have never been able to do a fried egg “sunny side up” without destroying it. Two tips that I think make all the difference here is to:
- Heat the pan and let the oil heat up a little bit.
- Cover the pan, so the white on tops cooks with the help of the steam and the egg is done when you shake the pan and it only the yok wobbles and there is no runny white on the top.
Cooking on medium to low heat is also important. Slow and low is the key to cooking eggs.
Cooking on medium heat is usually the correct temperature for most things. In the past I have always cooked on high so that I could just be done faster but things tend to burn quickly.
As I learn more about cooking, I realize that if you get the basics right it creates a good foundation to cooking. From there, things tend to be a variation of these simple basics, which is easier to do and less daunting once you have mastered the basics.

Hi Noreen I saw your blog just now and I liked it immediately , it looks so promissing keep the good work and do not mind my English. :))) it’s not my mother tong
Hey, just wanted to thank you for this great post! I was recently asked by an older gentleman to help him learn the basics of cooking. As a chef this sounded easy, but as the deadline grows closer I realize there are soooo many techniques and different foods to be taught and so little time. Your “Cooking Basics 101” post was a great help in coming up with my “Curriculum “. Thanks again!
Thanks James, I’ll be sure to pass it along to Verity who wrote this for us. 🙂
I really like to know how to cook